MicroPython
Learn how to connect to the Arduino Cloud using MicroPython.
Introduction
This tutorial guides you on how to use the MicroPython library to connect your Arduino device to the Arduino Cloud.
It requires your board to have a version of MicroPython installed, which is covered in this article.
To find our full MicroPython documentation, head over to the MicroPython Docs page.
Goals
The goals of this tutorial are:
- Connect your Arduino device to your Wi-Fi® network.
- Connect your Arduino device to the Arduino Cloud via MicroPython.
- Control an LED using the Arduino Cloud.
Hardware & Software Needed
- Arduino Lab for MicroPython
- Arduino GIGA R1 WiFi or Portenta H7
- Nano ESP32
- MicroPython >= 1.2 installed on your Arduino device.
To install MicroPython, read the MicroPython Installation Guide written for all Arduino boards.
Cloud Setup
Before we start, make sure you have MicroPython installed on your board. If you haven't you can follow this tutorial.
Then, we need to configure a Thing in the Arduino Cloud consisting of two boolean variables called
ledledSwitchThing & Device Configuration
- Create a new Thing, by clicking on the "Create Thing" button.
- Click on the "Select Device" in the "Associated Devices" section of your Thing.
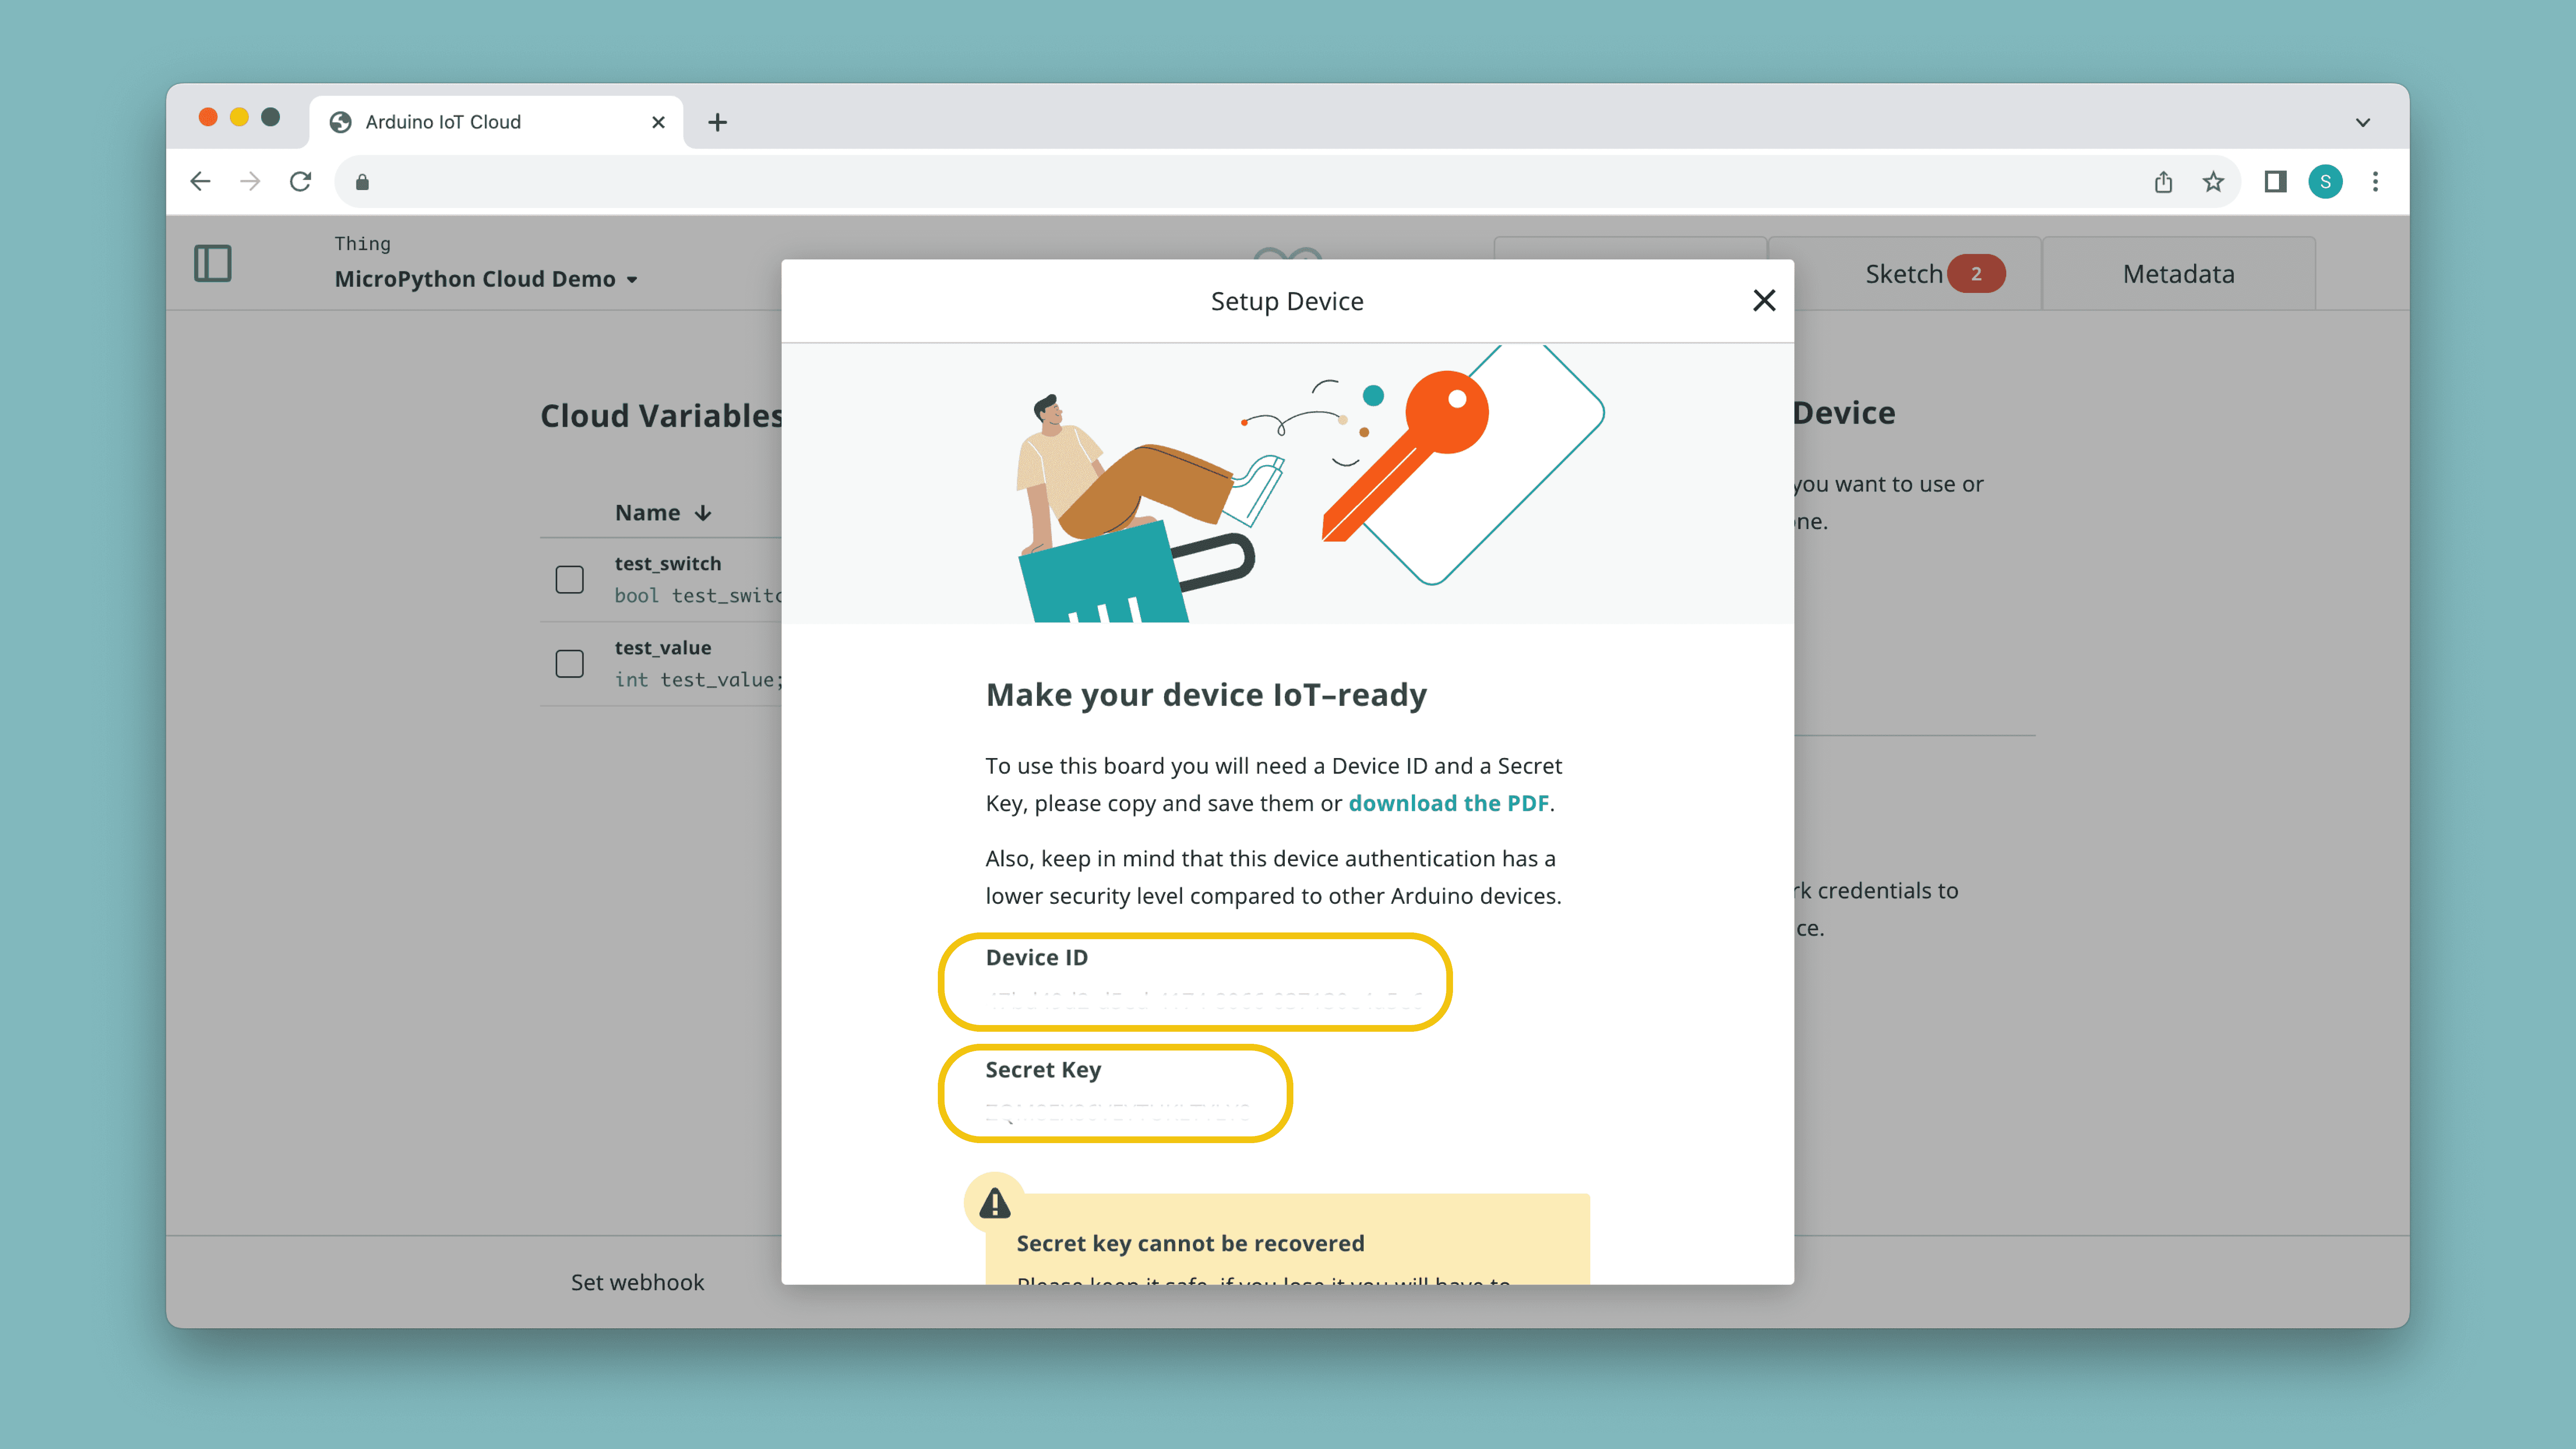
- Click on "Set Up New Device", and select the bottom category ("Manual Device"). Click continue in the next window, and choose a name for your device.
- Finally, you will see a new Device ID and a Secret Key generate. You can download them as a PDF. Make sure to save it as you cannot access your Secret Key again.
- Learn more about Things in the Things documentation
- Learn more about Devices in the Devices documentation
Create Variables
Next step is to create some Cloud variables, which we will later interact with via a MicroPython script.
- While in Thing configuration, click on "Add Variable" which will open a new window.
- Name your variable
and select it to be of anled
type.boolean - Click on "Add Variable" at the bottom of the window.
- Create another variable, name it
and select it to beledSwitch
type.int
You should now have two variables:
- booleanled
- booleanledSwitch
It is important that they are named exactly like this, as we will be using them in the example script of this guide.
Your Thing should look something like this when you are finished:

Learn more about how variables work in the Variables documentation
Create Dashboard
When finished with creating your Thing, we also need to create a dashboard, a tool to monitor & interact with the Cloud variables.
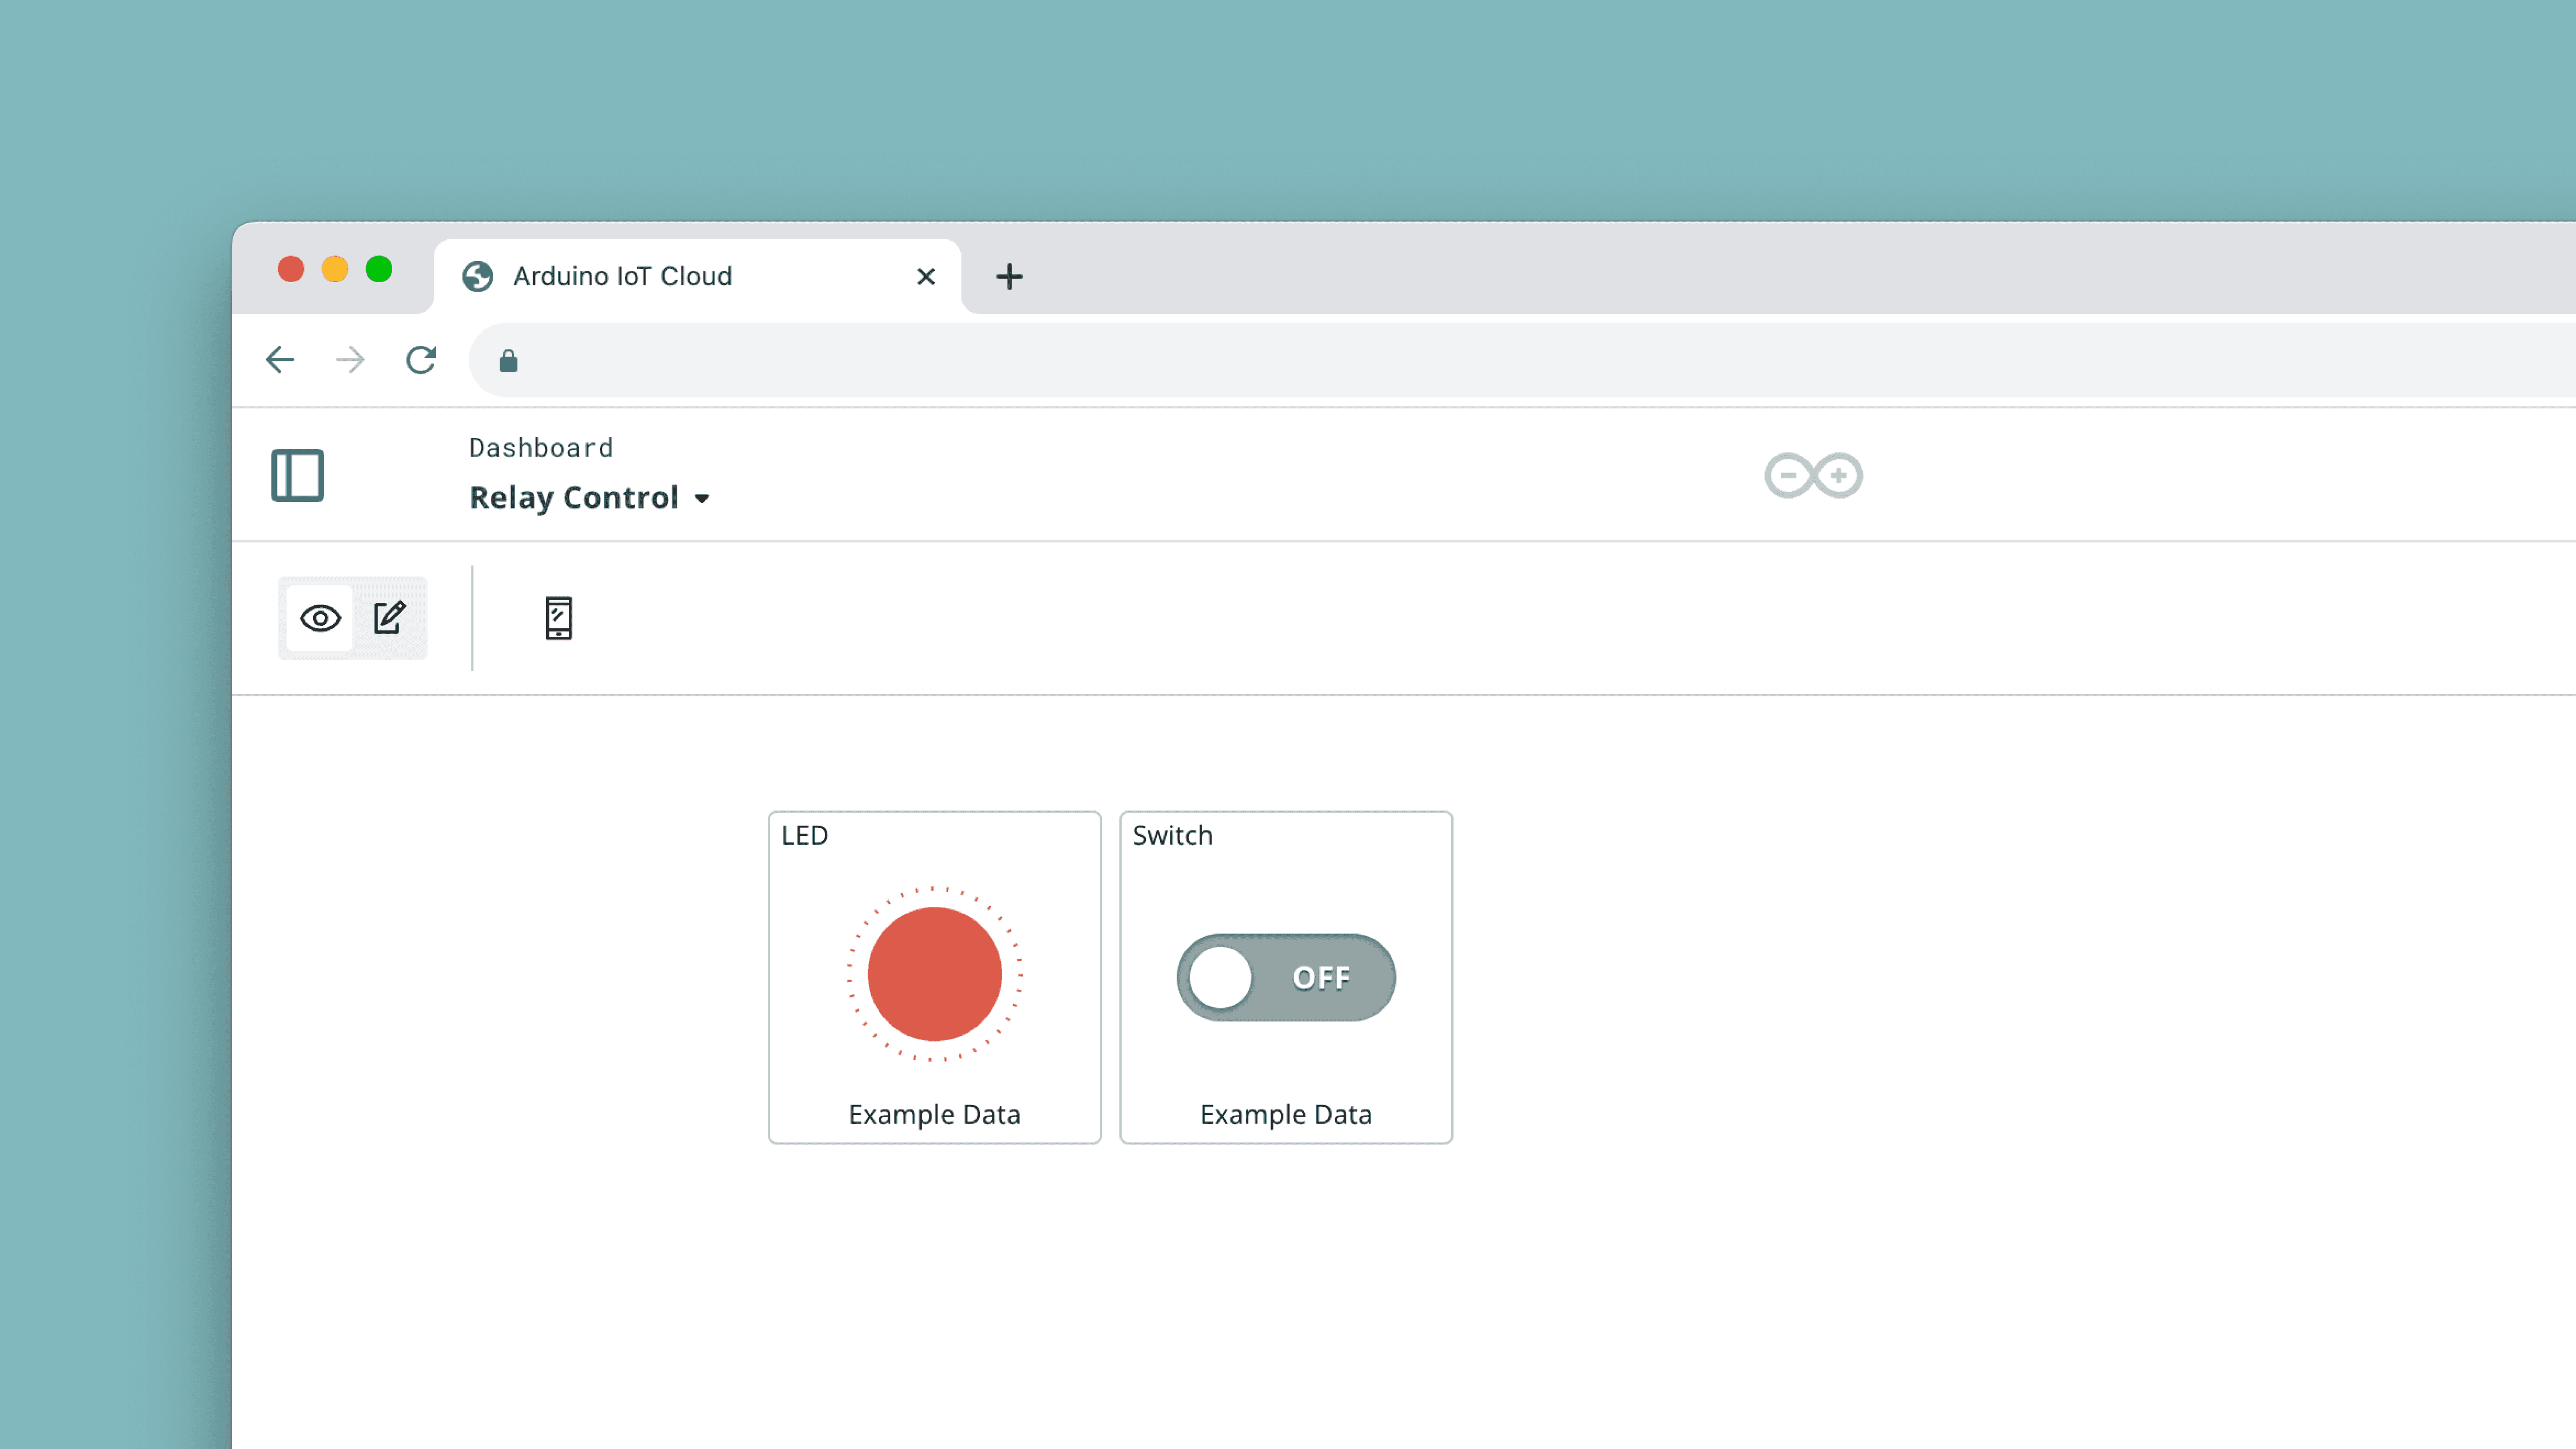
- Go to the dashboards section, and create a new dashboard.
- In the dashboard, first create a LED widget, and link it to the
variable we created earlier.led - Create a Switch widget, and link it to
.ledSwitch - You should now have two widgets, looking something like the image below:
We are now finished with the Arduino Cloud configuration, and we can proceed with the MicroPython setup.
MicroPython Setup
In this section, we will install the Arduino IoT Cloud Python library on the Arduino board, and run a script that synchronizes the board with the Arduino Cloud.
Create Secret.py File
During the device configuration, you obtained a device ID and secret key. These details can be stored, along with your Wi-Fi® credentials, in a
secrets.pysecrets.py1WIFI_SSID = "myNetwork" # Network SSID2WIFI_PASSWORD = "passwordForWiFi" # Network key3DEVICE_ID = b"ef77wer88-0432-4574-85e1-54e3d5cac861"4CLOUD_PASSWORD = b"TQHFHEKKKLSYMPB1OZLF"In a MicroPython editor, you can create this file, and save it on your board running MicroPython.
This file should be copied over to the flash drive that mounts when MicroPython boots. To do so you can use the file manager tool in Arduino Lab for MicroPython. Please note that the latter option is not recommended as the file system can potentially get corrupted when copying files manually.
Install Cloud Library
To install the Arduino Cloud (Micro)Python library on your board, you can use the Python based tool
mpremotempremote1$ pip install mpremoteRun
mpremote connect list1/dev/cu.usbmodem3871345733302 335B34603532 2341:055b Arduino Portenta Virtual Comm Port in HS ModePass this serial number (the second value) to the install command:
1$ mpremote connect id:335B34603532 mip install github:arduino/arduino-iot-cloud-pyThis will install the library and all required dependencies on the board. Another option is to manually copy the files from the library's repository to the board's file system. It's good practice to put those files into a folder called
libFor more options on how to install libraries on your board, check out our Installing Modules Guide.
Programming the Board
Here is the example code to copy and paste into your sketch. It connects your device
1from machine import Pin2import time3import network4import logging5from arduino_iot_cloud import ArduinoCloudClient6
7from secrets import WIFI_SSID8from secrets import WIFI_PASSWORD9from secrets import DEVICE_ID10from secrets import CLOUD_PASSWORD11
12led = Pin("LEDB", Pin.OUT) # Configure the desired LED pin as an output.13
14def on_switch_changed(client, value):15 # Toggles the hardware LED on or off.16 led.value(not value)17 18 # Sets the value of the Cloud variable "led" to the current state of the LED19 # and thus mirrors the hardware state in the Cloud.20 client["led"] = value21
22def wifi_connect():23 if not WIFI_SSID or not WIFI_PASSWORD:24 raise (Exception("Network is not configured. Set SSID and passwords in secrets.py"))25 wlan = network.WLAN(network.STA_IF)26 wlan.active(True)27 wlan.connect(WIFI_SSID, WIFI_PASSWORD)28 while not wlan.isconnected():29 logging.info("Trying to connect. Note this may take a while...")30 time.sleep_ms(500)31 logging.info(f"WiFi Connected {wlan.ifconfig()}")32
33if __name__ == "__main__":34 # Configure the logger.35 # All message equal or higher to the logger level are printed.36 # To see more debugging messages, set level=logging.DEBUG.37 logging.basicConfig(38 datefmt="%H:%M:%S",39 format="%(asctime)s.%(msecs)03d %(message)s",40 level=logging.INFO,41 )42 43 # NOTE: Add networking code here or in boot.py44 wifi_connect()45 46 # Create a client object to connect to the Arduino Cloud.47 # For MicroPython, the key and cert files must be stored in DER format on the filesystem.48 # Alternatively, a username and password can be used to authenticate:49 client = ArduinoCloudClient(device_id=DEVICE_ID, username=DEVICE_ID, password=CLOUD_PASSWORD)50
51 # Register Cloud objects.52 # Note: The following objects must be created first in the dashboard and linked to the device.53 # This Cloud object is initialized with its last known value from the Cloud. When this object is updated54 # from the dashboard, the on_switch_changed function is called with the client object and the new value.55 client.register("ledSwitch", value=None, on_write=on_switch_changed, interval=0.250)56
57 # This Cloud object is updated manually in the switch's on_write_change callback to update the LED state in the Cloud.58 client.register("led", value=None)59
60 # Start the Arduino Cloud client.61 client.start()Explanations:
- Connects to your local Wi-Fi® using the credentials specified in secrets.py.wifi_connect()
- Registers a variable that will be synced with the Cloud.client.register
- Is the callback that gets executed when theon_switch_changed
variable is changed by toggling the switch on the Cloud dashboard. This function in turn toggles the on-board LED and updates the Cloud variableledSwitch
that reflects the state of the on-board LED to be displayed in the Cloud dashboard.led
- Enters a loop that runs as long as the board is connected to the Cloud and synchronises data as it runs.client.start()
Testing It Out
Open Arduino Lab for MicroPython and connect to your board. Pasting the above code and run the script. Then open your Arduino Cloud dashboard. You should see the registered "ledSwitch" and "led" widgets. Toggle the "ledSwitch", and the LED on your Arduino board should light up accordingly. The state of the "led" variable should also change, mirroring the state of the physical LED.
Troubleshoot
If the code is not working, there are some common issues we can troubleshoot:
- Make sure MicroPython >= 1.2 is installed on your board.
- Check the Wi-Fi® credentials in the
file.secrets.py - Ensure the device ID and Cloud password in the
file match with what is registered on the Arduino Cloud.secrets.py - Make sure your Arduino Cloud Thing is correctly set up and your device is assigned to it.
Conclusion
This tutorial has guided you through the process of connecting your Arduino device to the Arduino Cloud using MicroPython. You learned how to install the necessary library, set up your device, and control an LED via the Arduino Cloud. This opens up possibilities for more complex applications, as you can control and monitor your Arduino device remotely.
Suggest changes
The content on docs.arduino.cc is facilitated through a public GitHub repository. If you see anything wrong, you can edit this page here.
License
The Arduino documentation is licensed under the Creative Commons Attribution-Share Alike 4.0 license.